Giving BodyParts3D objects useful names in Blender
17 Aug 2013The BodyParts3D database from the Life Science Database Archive is brilliant - a couple of thousand separate meshes of organs and anatomical parts that add up to a male human body. There is a downside, and that is that the object files are named rather obtusely as FJ1252.obj and FJ1702M.obj. I found out about it from this forum thread at Blender Artists, and the basic Blender actions are based on those proposed by PietPW.
The main reason for writing this post is that PietPW's method of renaming the files relies on an older dataset, as the latest release has changed formats from a straight "this is what this file depicts" to a more obscure separate database of files that describe the relationship of these files to an anatomical 'tree'.
I'm using the IS-A Tree dataset, so I'll be using the "isa_" prefixed files.
Getting the meshes into Blender
First, download the mesh zip file (it's big!) and unzip into a suitable folder. I'm using Linux, so I've put it in my home directory although it is certainly possible to do this on Windows. Keep everything tidy and put the .obj files into a folder called obj.
Next start Blender, open up a text editor pane and create a new text file. Name it something purposeful like "Import Meshes" and then save your .blend. Edit the basedir variable to represent where your mesh files are stored. On windows this might be something like C:\adnbr\body\obj\.
import bpy
import os

dir = "/home/adnbr/body/obj/"
i = 0

for obj in os.listdir(dir):
    bpy.ops.import_scene.obj(fp = os.path.join(dir, obj))
    bpy.data.objects[i].name = obj
    i = i + 1
Once you have the data inside Blender, it needs scaling to a more appropriate size. Do this by pressing A to select everything, then S to enter scale mode. Type 0.2 and press Enter. Do this scaling again and the model is now at a more manageable size. You can rotate everything by 90° on the X axis to get the man the right way up by pressing R, then X and then typing -90. Finally, press Enter to finalise.
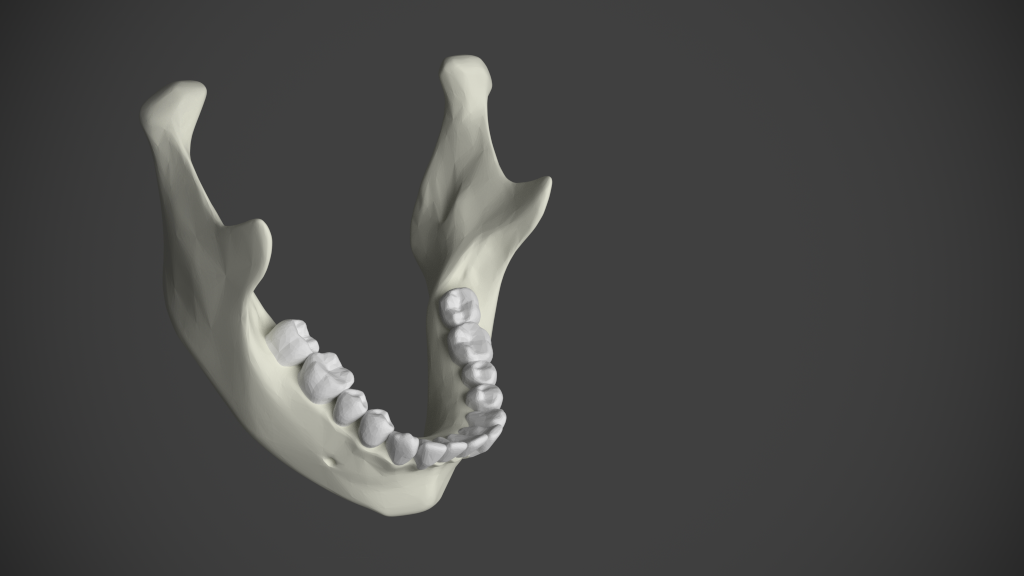
You should now have something that looks a bit like this in your Blender 3D view pane.
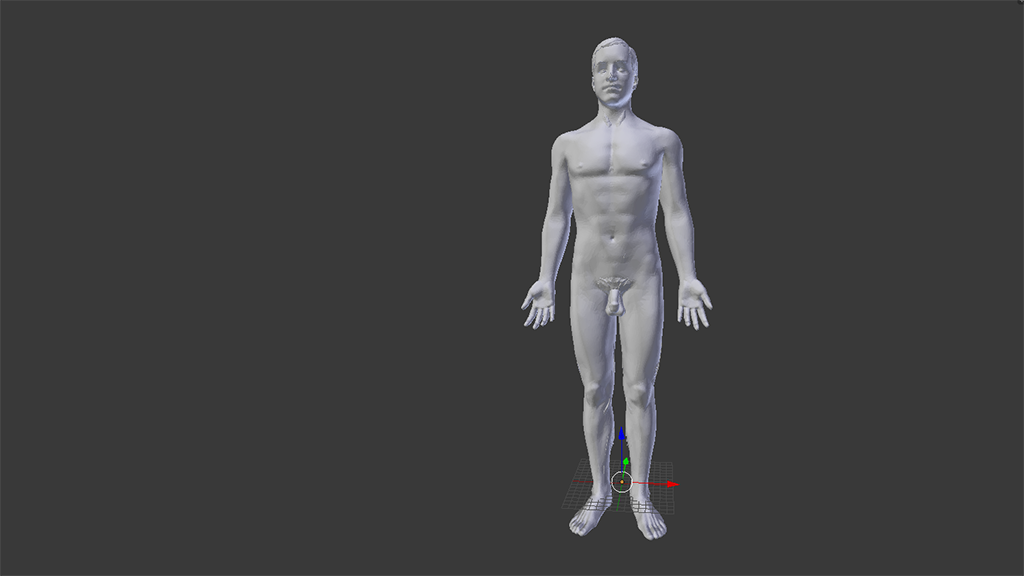
Wonderful. Very, er, anatomical indeed.
Sorting through the relationship data
If you don't particularly care about the route taken to get to the usable data, you can skip down to importing the data. Essentially the following involves a bit of SQL.
I first started looking at the file isa_elements_parts.txt which is the only file that associates the file names with an English text name or description of the part. This must be the place to start, surely? There are typically 9 entries for each file, with varying degrees of anatomical accuracy - ranging from the vague organ and segment of artery to the more precise (and presumably more useful to anatomists) medial head of right flexor hallucis brevis and inferior pancreaticoduodenal artery.
After opening up the file in LibreOffice Calc and sorting by the file_id column there at first appears to be a pattern - the third item in each collection of file ids appears to be the useful description, and there are 9 items per file id. Brilliant! Job done, lets just use the offset function to copy every 9n+3 item to a new sheet.
But wait, no such luck. Not only are there sometimes more (and other times less) than 9 descriptions for a file id, there are also varying placements in the order of the list. No luck with that approach.
isa_inclusion_relation.txt describes how the mesh files are related to each other in a tree form, using the FMA codes found as the first column in the previous file we checked. The deeper into the tree we go the more precise the descriptions get, so if we find leaves (items in a tree that do not have branches) then presumably these would tally with the most precise items in the list.
We can find the leaves in a trivial database by using a query very similar to the one described by Mike Hillyer in his post Managing Hierarchical Data in SQL.
For this to happen I've imported the two text files (isa_inclusion_relation.txt and isa_elements_parts.txt) into a temporary MySQL schema on my local machine, naming them inclusion_relation and element_parts appropriately. This query will then filter through the nodes in the tree database and return any leaf nodes, and then use that data to spit out what is presumably the most precise name for the anatomical part depicted by a file.
SELECT name, file_id FROM working.element_parts
    WHERE concept_id IN (
        SELECT t1.child_id
            FROM inclusion_relation AS t1
                LEFT JOIN inclusion_relation AS t2
                    ON t1.child_id = t2.parent_id
            WHERE t2.child_id IS NULL
    );
This exported file is available to download here. It only has 1652 entries which is frustrating as it leaves some 582 unnamed objects after the importing. This reality is much better than 2200+ unnamed files though, so let's run with it. Don't let MySQL Workbench's default 1000 entry query limit catch you out like it did me when preparing data for export, you can change it to unlimited in the preferences.
Importing the data
Now that we have a list of mesh files and their readable names properly naming the objects in Blender is not a problem at all - we just need to check for the name of the object with the list of expected file IDs and then drop in the name as appropriate.
So create a new text file in Blender and run the following script - it's not very efficient so it might take a couple of minutes to churn its way through the data but it gets the job done. I've left the original file ID in the new name so that there is the option of using the search function with a specific ID or a full name.
import bpy
input = open("/home/adnbr/body/filtered-names.txt","r")
i = 0

in1 = input.readline()

while in1:
    # Read remaining lines and get rid of EOL markers
    in1 = input.readline().strip()
    # Split by commas. It is a CSV.
    in2 = in1.split(",")
    # Check each of the objects in the scene
    for i in range(0, len(bpy.data.objects)):
        # Does the name match with an appended extenstion?
        if in2[1] + ".obj" == bpy.data.objects[i].name:
            # Update the name to the SQL outputted name,
            # keep the ID so that we can find meshes
            bpy.data.objects[i].name = in2[1] + ": " + in2[0]
            # Just so we know the code is actually working
            print(bpy.data.objects[i].name )
input.close()
Working with single items
If you import a single mesh manually then it will probably appear way off to one side, hidden in the depths of the maximum render distance. By the time you manage to get it somewhere useful and scaled to an appropriate size you will find that the origin is way off the centre of the model. To counteract this, select the single mesh and press the <Space> key, then type Set origin <Enter> and select Origin to center of mass. To easily move the mesh to the cursor simply hit the <Space> key again and Snap Slection to Cursor.
This assumes that you haven't moved your 3D cursor, of course. To return the 3D cursor to the centre of the grid simply use <Space> Snap cursor to center.
What's the next step
I'd like to somehow account for the 582 unnamed files at some point - it might just be a case of sorting branches by depth and then using the deepest node for the name instead of solely leaf nodes.